
February 7, 2025
In today’s fast-paced software development world, user experience can make or break a product. Users expect highly available applications that respond swiftly, even during peak traffic. But how can you ensure your application will perform well in high-demand scenarios during development?
Azure Load Testing provides an effective way to identify and address performance issues early, ensuring that your application is optimized before it reaches end-users. In this post, we’ll explore how to leverage Azure Load Testing to run high-scale load tests without complex infrastructure and how to automate these processes within your Continuous Integration/Continuous Deployment (CI/CD) pipeline using Azure Pipelines.
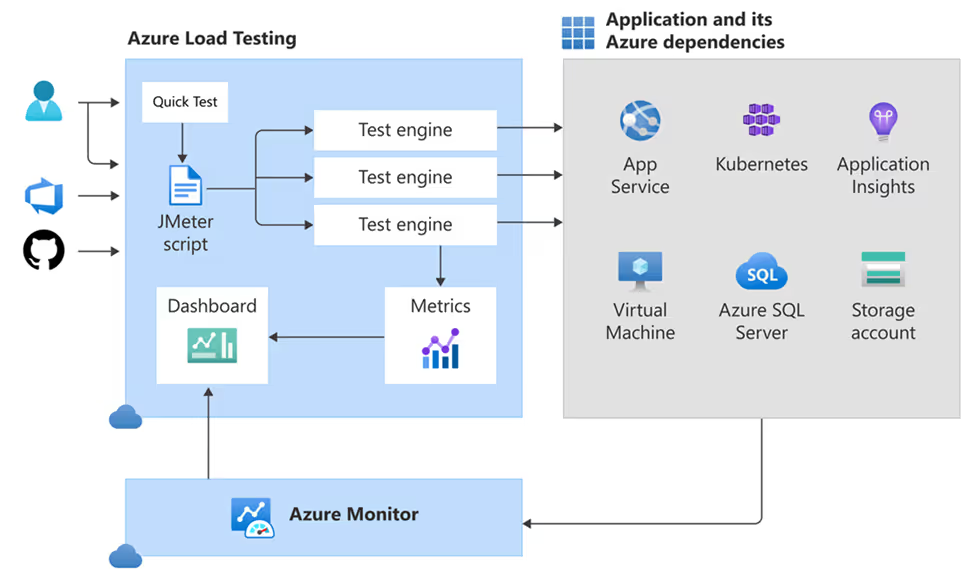
Load testing is critical for confirming that your application can handle expected user traffic by simulating real-world demand. This proactive testing approach helps prevent issues, enhances user experience, and ensures operational reliability, ultimately saving both time and resources by catching problems early. The following diagram shows ahigh-level overview of the various components of Azure Load Testing which we will go over.
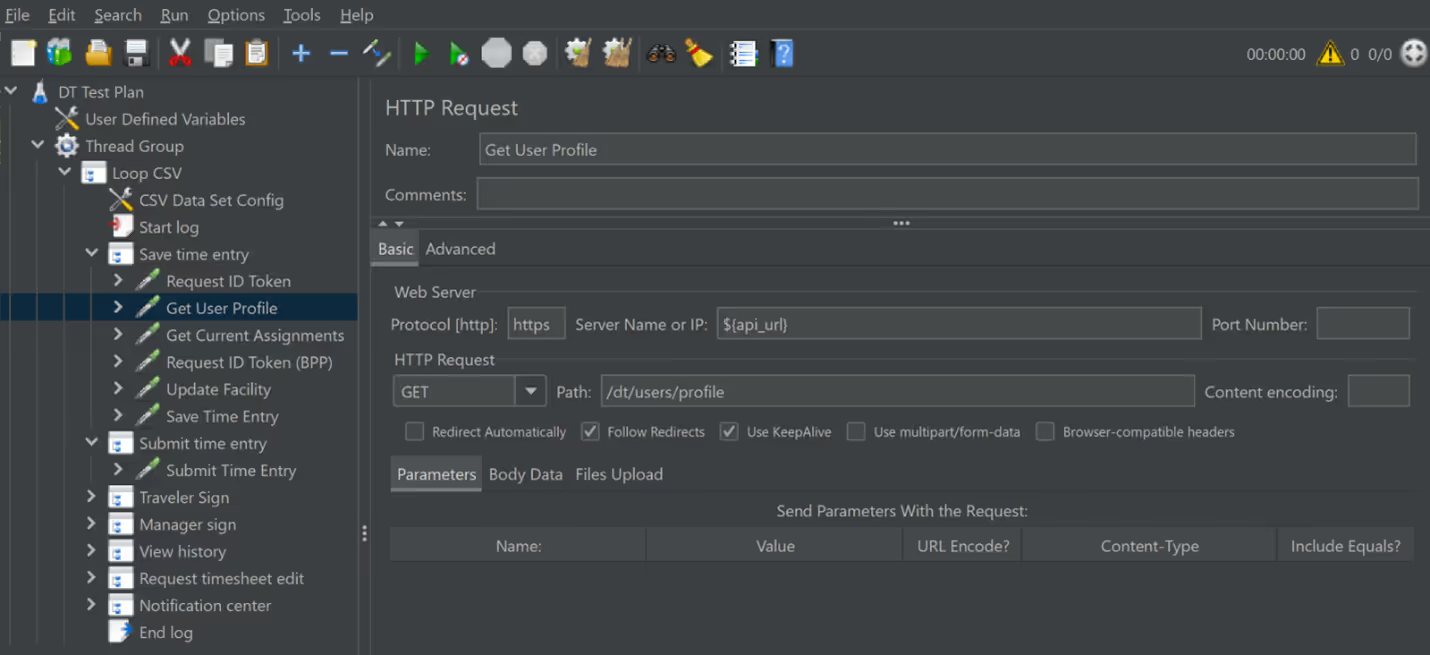
To begin, translate user workflows into a JMeter script. A basic test plan should include:
For secure testing, store sensitive data under User Defined Variables instead of hardcoding it. Closely replicating real user behavior in your test scenarios will yield more accurate results.

Note: Try to make your test scenario as close to how the user would interact with the application. This will ensure that your results are accurate.
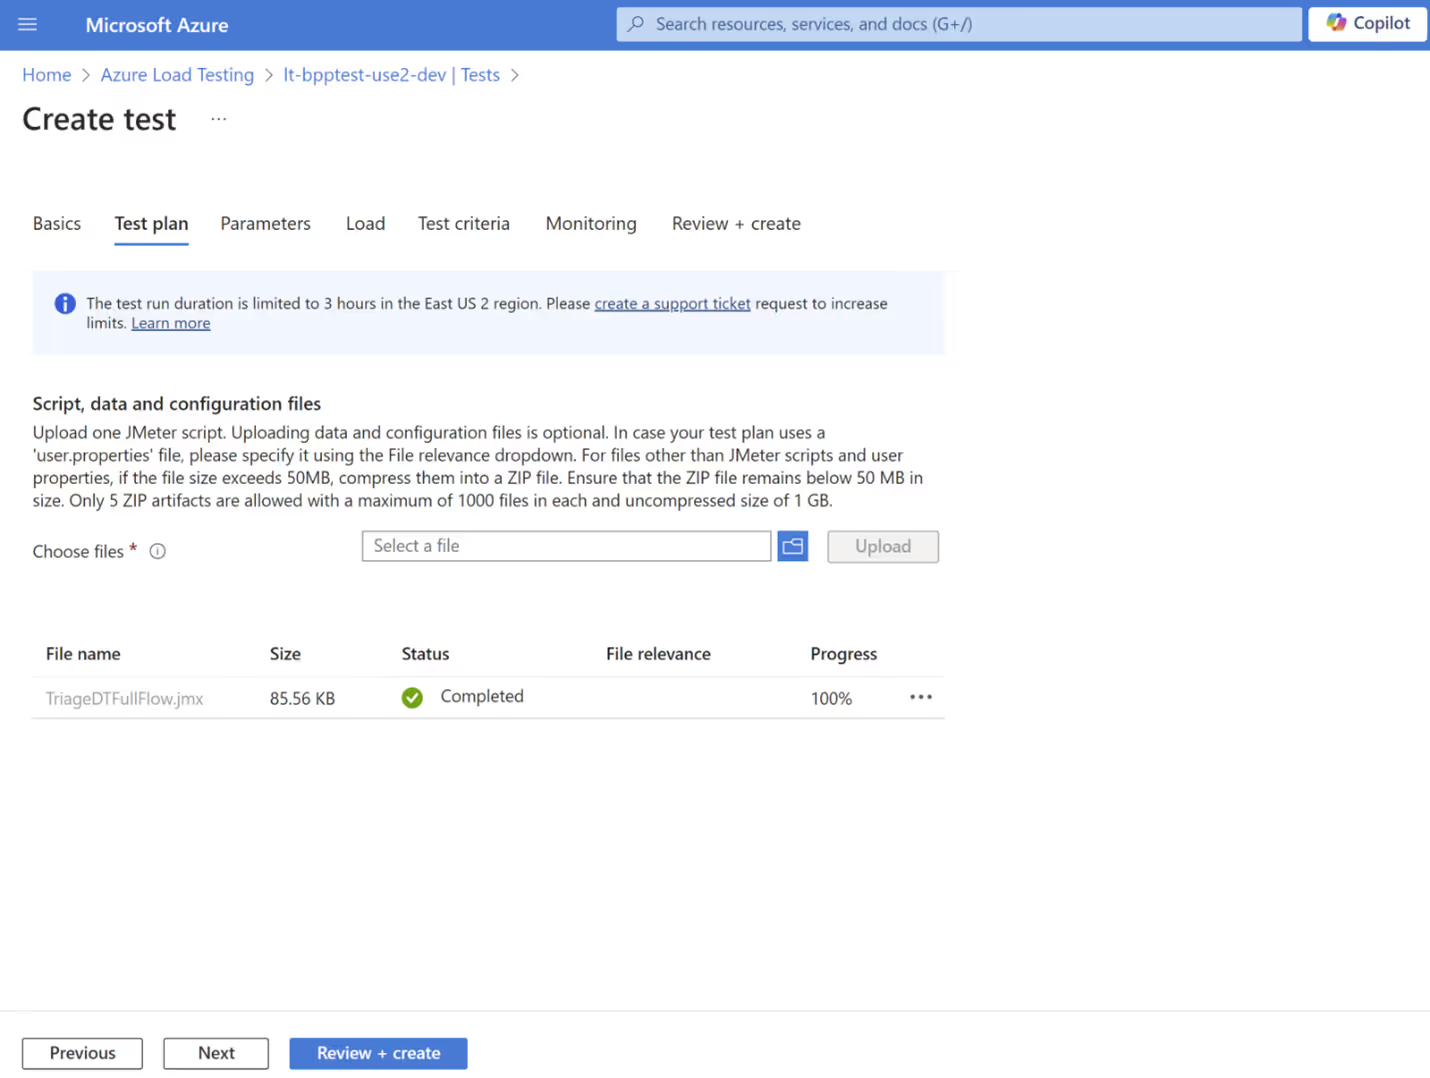
With a completed JMeter script, create an Azure Load Testing resource in your Azure subscription. Once the resource is set up, navigate to the service and upload your JMeter script. Configure the test to distribute the load across multiple machines and upload any additional files required, such as images or user datafiles.
Include any sensitive parameters, such as environment variables or secrets, from the key vault to avoid hardcoding in the script.
You can automate the creation and execution of your load tests in Azure Load Testing by integrating them into your CI/CDpipeline.
In your Azure YAML pipeline, add a step to build and deploy the Azure Load Testing resource to your subscription and resource group.
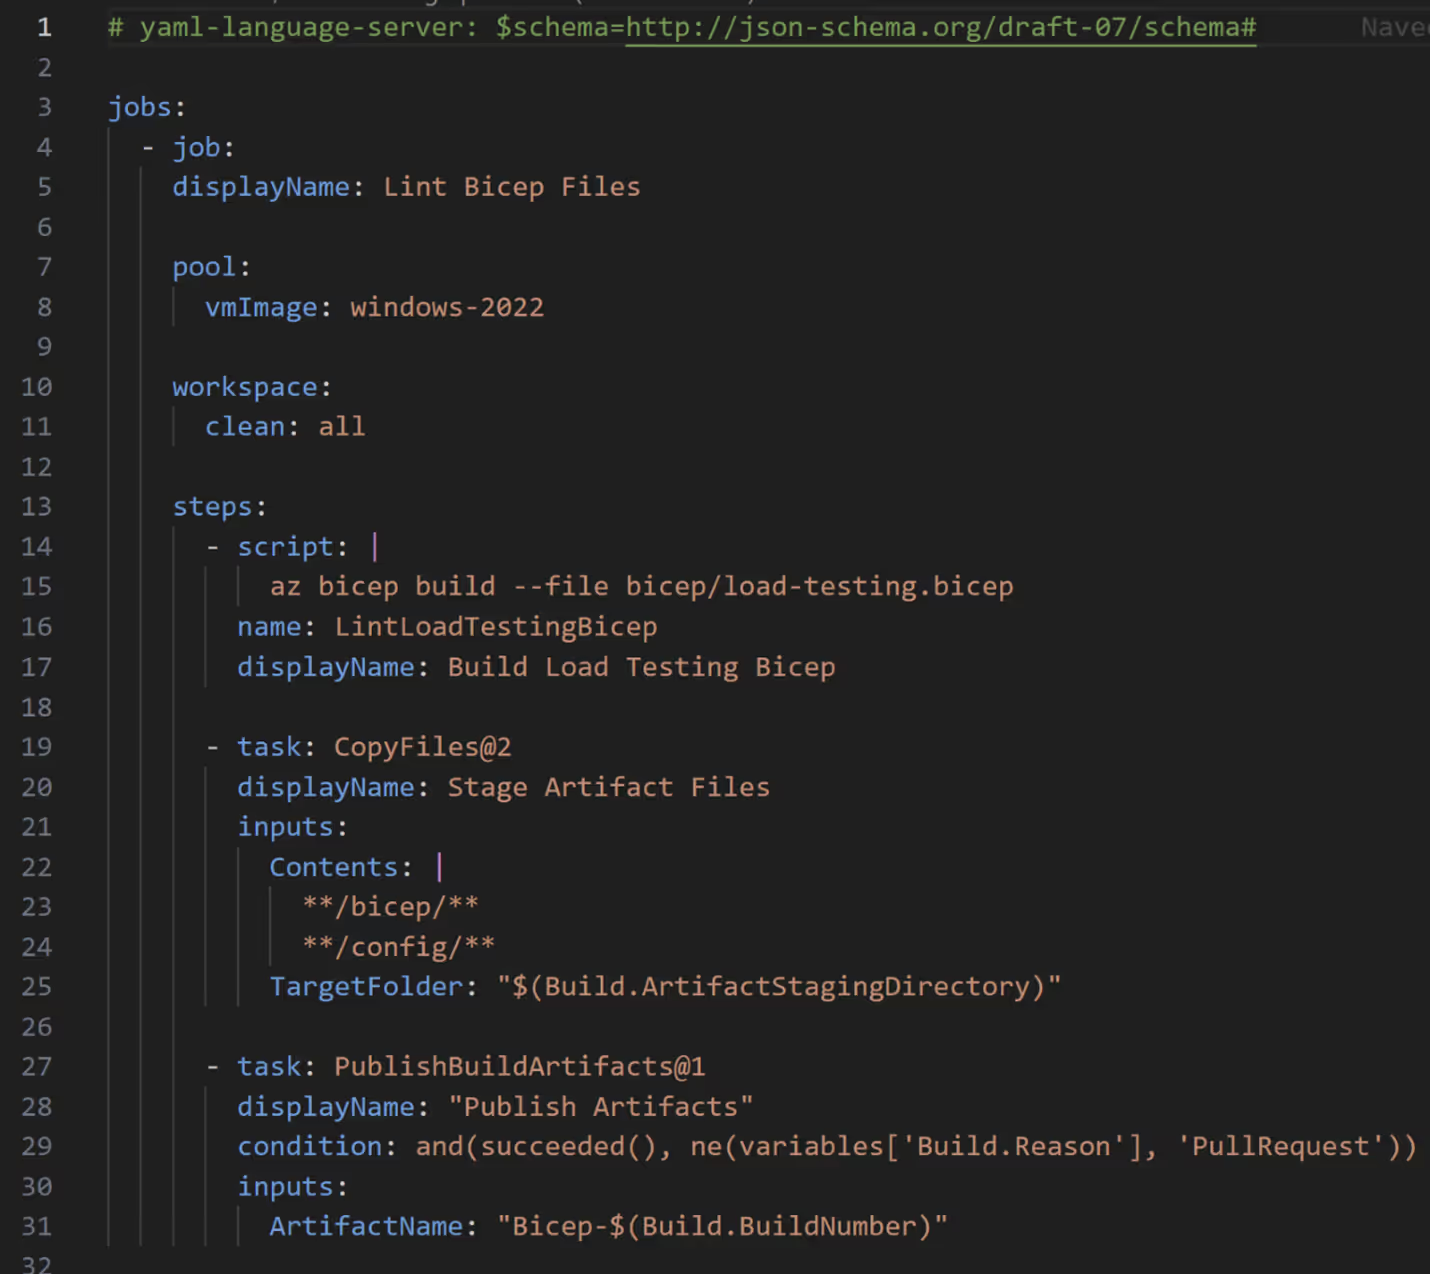
After the resource is deployed, create and run the load test using AzureLoadTest task to create and run the load test, here you will reference the loadTestResource you previously created and a loadTestConfigFile to create your test.
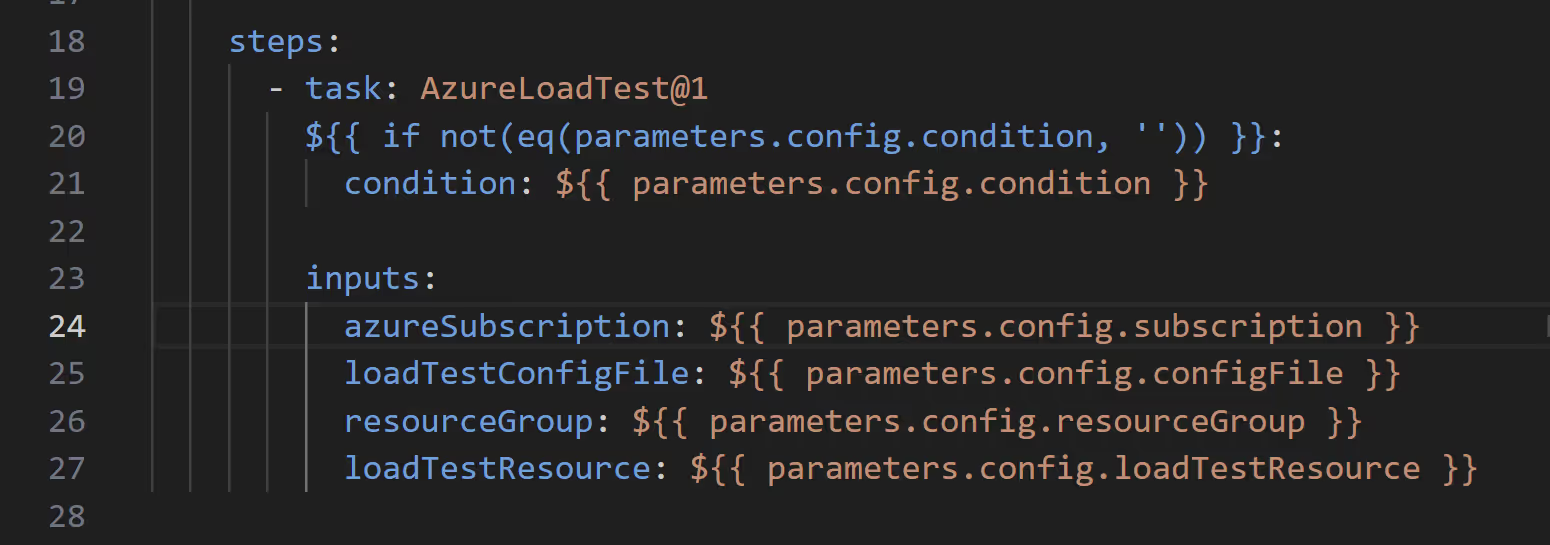
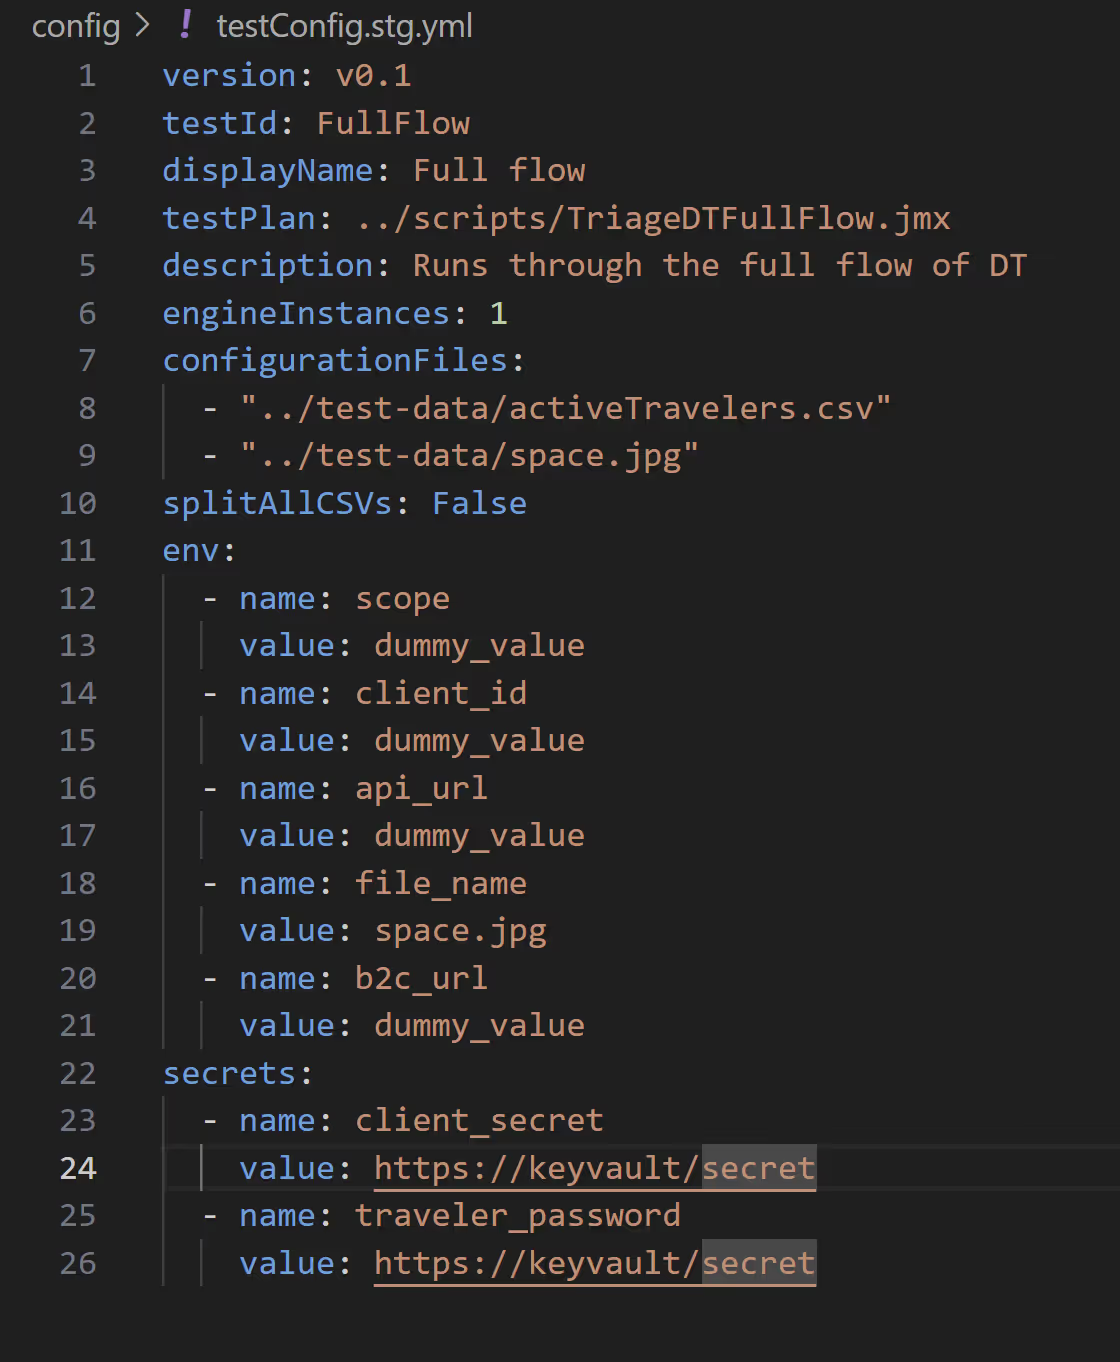
The configuration file will contain details such as the test name, script location, number of engines, all the environment variables, and secrets used in your JMeter test.
Note: when referencing keyvault secrets, you will need to grant the managed identity of the load testing resource access to those secrets. This can be done by going to Access Policies in your keyvault and creating a new policy for your load testing resource.
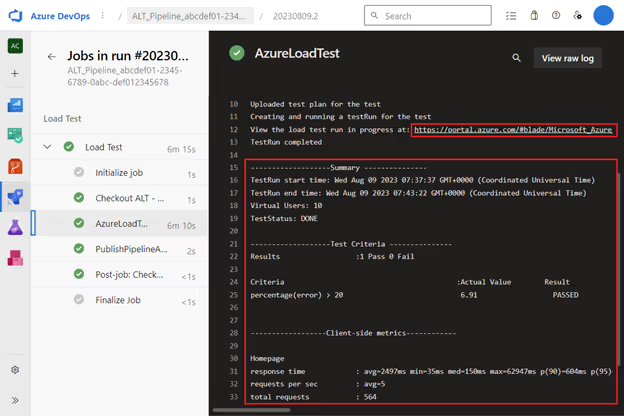
After your pipeline completes, review test results in the Azure Load Testing dashboard, which displays critical performance metrics such as response time, error rate, and throughput.
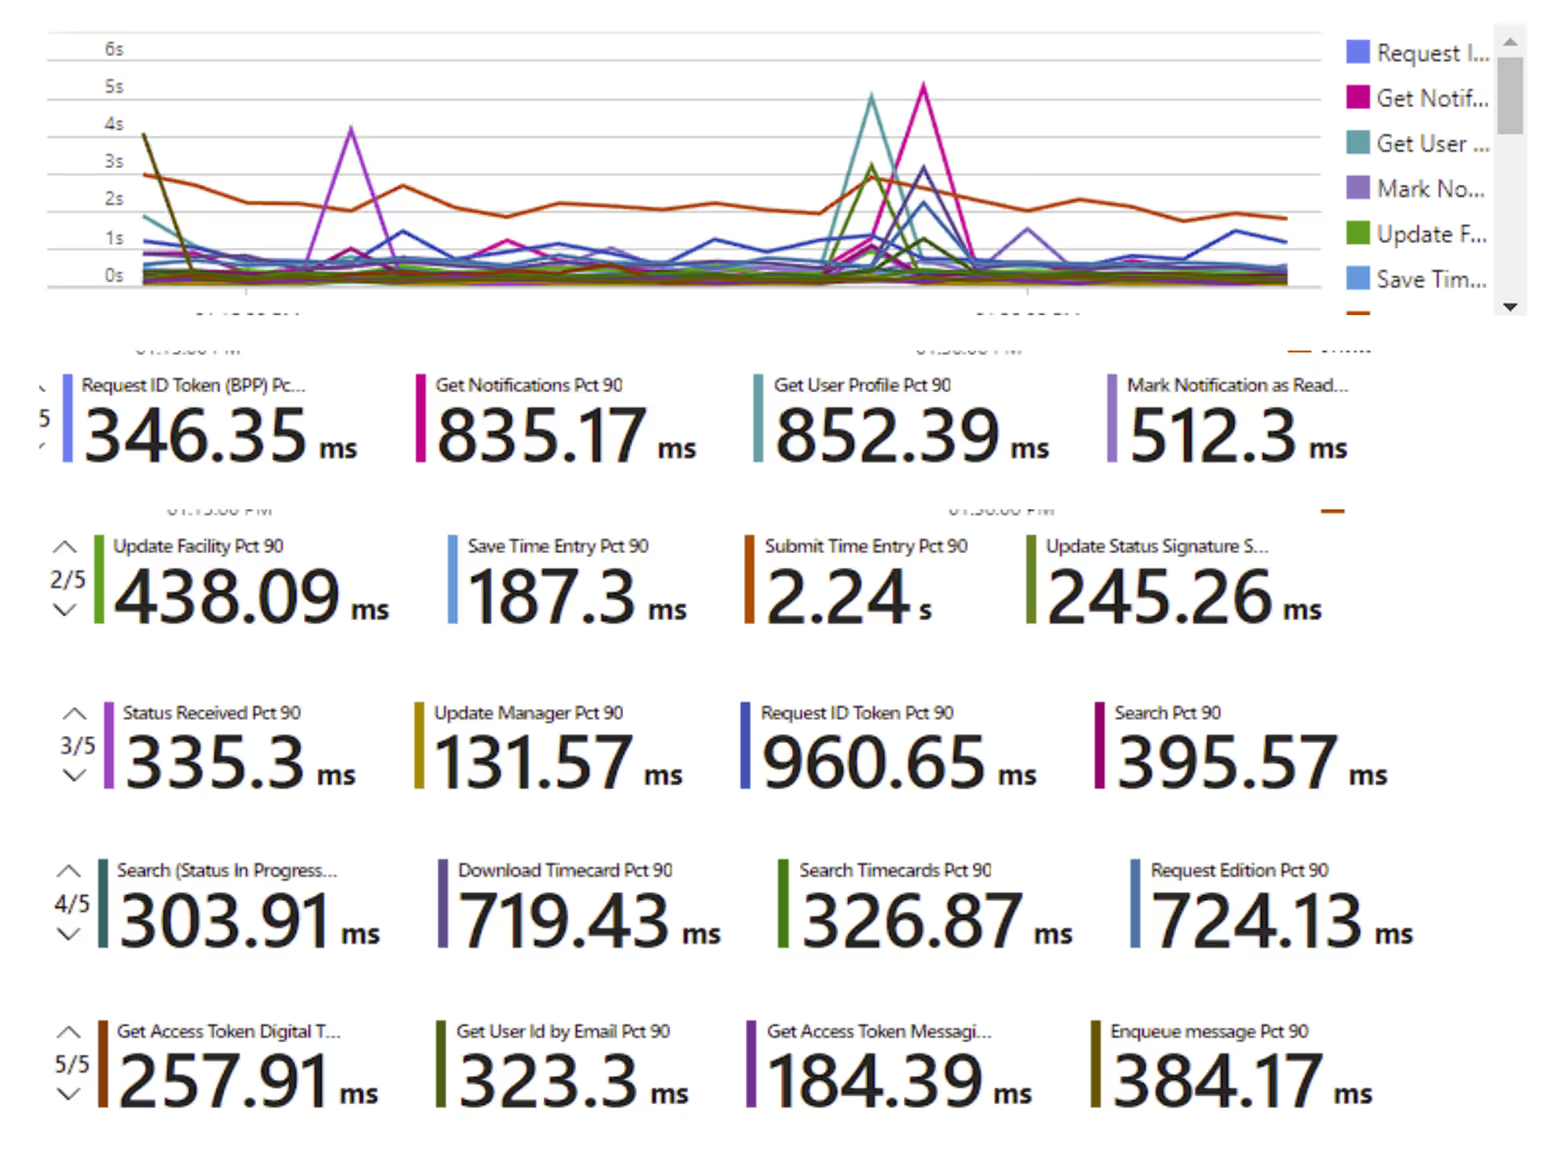
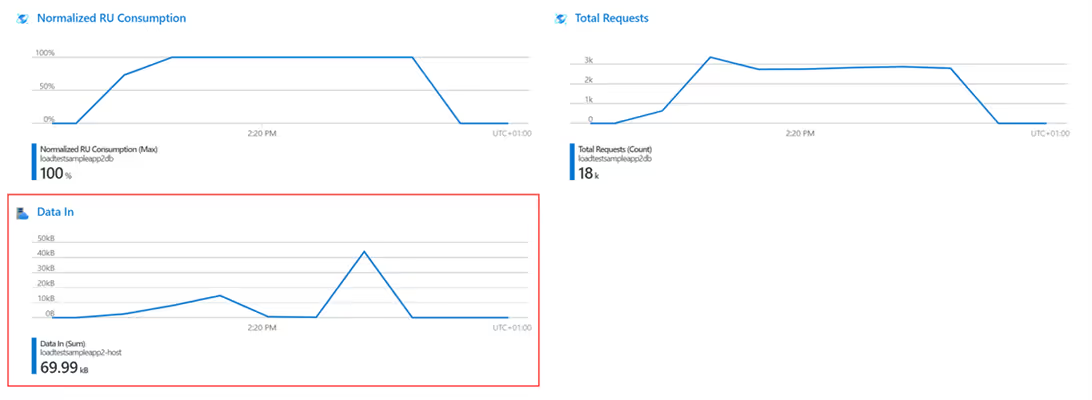
Server-side metrics: Available for Azure-hosted components, these metrics offer insights into app services such as database interactions and HTTP response types, helping identify bottlenecks in your services.
Azure Load Testing is essential for ensuring applications can manage peak traffic and provide a seamless user experience. By simulating user interactions and identifying performance bottlenecks, Azure’s tools allow you to test at scale without complex infrastructure. This proactive approach ensures your software is production-ready with optimized performance.
Lunavi can help clients streamline their load and performance testing by leveraging Azure LoadTesting. With our expertise, we ensure that your application performs seamlessly under load, integrating testing directly into your development pipeline. Whether automating tests or addressing performance challenges, Lunavi provides solutions that deliver reliable, high-performance applications to your users.
