
March 1, 2023
In one of my previous posts, I talked about setting up a build server to run Coded UI Tests. In this post I am going to talk about creating a Coded UI Test and running it from Microsoft Test Manager. This completes the full testing story. The build server can run the regression tests and the tests can run any automated test from Microsoft Test Manager on demand.
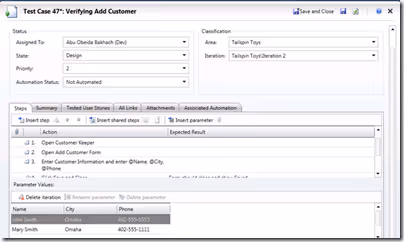
First, create the Test Case in Microsoft Test Manager. This is a simple test that opens the application and customer form. Then it enters some information to the form, saves, and closes the form.
Next, in MTM, go to the Test Tab and Run the test. Microsoft Test Runner should open. Check the Create/Overwrite action recording checkbox and click Start Test.
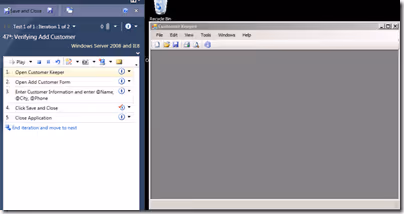
Finish going through the test. Be sure to be on the appropriate step of the test case when you perform the step in the application. It is capturing all of clicks to the particular step that is selected. Save and Close the test. Make sure to save the action recording.
Switch your hat to the Developer cap. Open Visual Studio 2010 Premium or Ultimate. Create a new test project. To create a new Coded UI Test, right click on the project and choose Add > Coded UI Test. A dialog appears to choose either Record actions or Use an existing action recording.
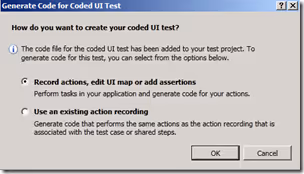
Since we already have the action recording, choose the “Use an existing action recording.” Search for the Test Case of the test that you just ran. When you click Ok, it will generate the code for the test. Run the test in Visual Studio and make sure the test passes. You will need to make sure the application you are testing is installed on your development machine.
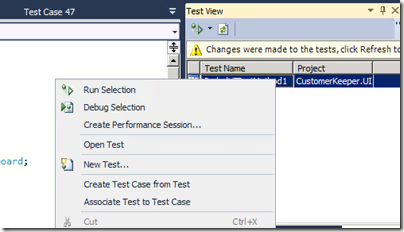
Once you verify the test is passing in Visual Studio, you can associate the automated test back to the test case. To do this, display the Test View window by going to Test > Windows > Test View. Right click on the test and choose “Associate Test to Test Case”
Find the Test Case and choose Ok. This will open the test case work item. Notice that the test is now associated with the test case.
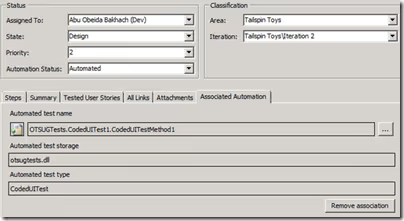
Also the Automation Status has been changed to Automated. Another thing is that the Automated test type shows “CodedUITest.” In addition to Coded UI Tests, Unit tests can be linked to a Test Case. This is very useful when you are using the unit test framework to do system level or end to end tests that would be at the same level as the Test Case.
Now that we have the test case automated, we need to configure the test environment before we can run it.
First choose a machine that where the tests will run. This can be a physical/virtual server or PC depending on the requirements of the application you are testing. On this machine, I installed the Visual Studio 2010 Test Controller and Visual Studio 2010 Test Agent. These could also be installed on separate machines. A test controller can support multiple test agent machines.
To install the Test Controller and Test Agent, download the Visual Studio 2010 Agents ISO. This contains the Test Controller, Test Agent, and Lab Agent.
First install the Test Controller. I always recommend using a domain account instead of the Network Service account. Register the Test Controller with the Team Project Collection. As it states, you must do this to create enable the test environment.
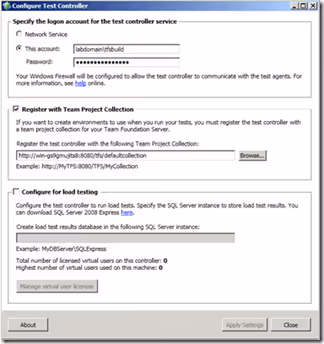
Once the Test Controller is configured, install the Test Agent. I also recommend using a domain account for the Test Agent. Configure the Test Agent to interact with the desktop. For the Coded UI Tests to run, they must be able to have full access to the desktop. This also means that the computer must be logged in and can’t be locked. Make sure to check the option to disable the screen saver and to log in automatically.

Also, one thing that I have learned is you can’t use Remote Desktop (RDP) to access the test machines. Logging out of RDP automatically locks the machine. If the machines are virtual then you need to use access them through the virtual machine host or another remote technology.
One optional item you can configure is to configure the test machine to record video. To do this follow these steps:
1. Install the RTM update for Lab Management on the server
3. If the machine is a server, install the Desktop Experience feature.
The test machine is now configured. Now we need to configure the test environment so that the automated test knows where to run.
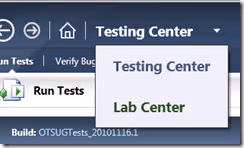
Switch back to Microsoft Test Manager. Change Testing Center to Lab Center by selecting it from the drop down.
First we need to create the environment. If Lab Management was installed and configured, we could configure a virtual environment. But since we have already configured a machine outside of Lab Management it will be considered a physical environment.
Select the Lab tab and choose New > New Physical Environment.
Fill in the Name and Description. Choose the Test Controller to where the environment is going to be created. Optionally, you can tag the environment. This could be helpful if you have multiple environments with different configurations.
Next select the machine from the available machines and assign it a role.
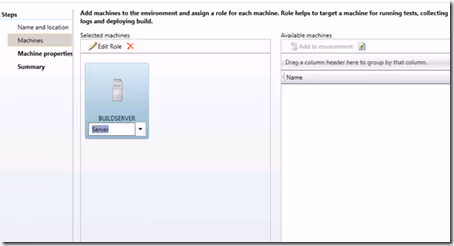
In a physical environment there isn’t anything to set in the machine properties. If it was virtual environment, you could specify the memory, product key, and other settings to configure the machine. Click on Finish to create the environment.
Next is to create the Test Settings that can be used to specify what kind of testing diagnostics to capture for each machine in the environment. In our example, we only have the one machine. Select the Test Settings tab and click on New.
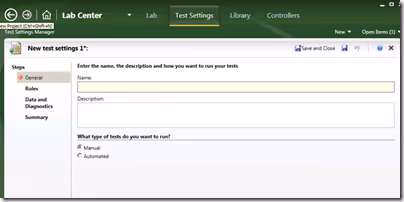
Give it a name. Usually name this in relation to how much diagnostic data you want to capture. Consider having a “Full” setting that has all or most of the diagnostics enabled and then another setting called “Light” or “Minimum”.
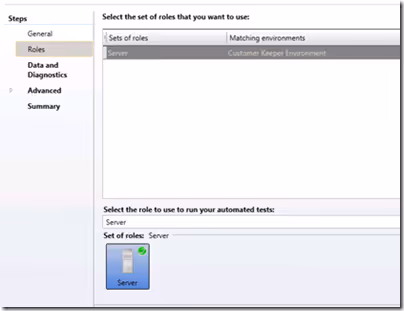
Select the Roles Tab. Make sure the machine is set to the appropriate role and is matched to the environment.
In the Data and Diagnostics, select any of the data you want to capture while you are testing. If your application write to the event log, be sure to check that. If you enabled the video recording, you can enable that option too. We don’t need to choose any of the advanced options. Once you have selected the diagnostic settings, click finish to create it.
Before we configure our Test Plan with these settings, we need a build to test against. We will need to create a new build definition, so reopen the test project solution in Visual Studio 2010 if it isn’t still open. In the Team Explorer window, right click on Builds and choose New Build Definition. The build definition will be pre-populated with the information from the solution. Choose a drop folder (you may have to create a share for this if one isn’t already created). Lastly, we are not going to run these tests from the build. Refer to my previous post if you want to also configure this. By default it will try to run the tests. Go to the Advanced settings and disable the Automated Tests.
Save the build. Right click on the build and choose Queue new build.
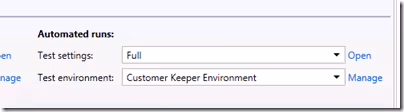
Now that we have the build, test settings, and environment our last step is to assign these to the Test Plan. Switch back Test Manager and make sure you are in Testing Center. Choose the Organize tab and Open Test Plan. First under Automated runs settings, choose the testing settings that you created. If it isn’t in the list, make sure you selected Automated for the settings. Next choose the environment.
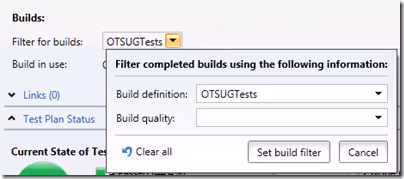
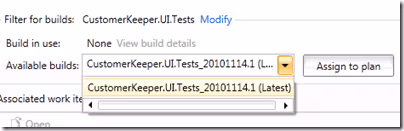
Next choose the build definition that you created and click Set build filter.
Assign the latest build of the build definition by click on the modify link. Then choose the appropriate build and click Assign to plan.
The settings for the automated test to run from Microsoft Test Manager are complete. Let’s go back to the test and run it as an automated test.
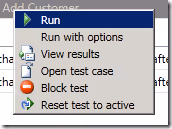
Switch back to the Test tab. Locate the test that you created. Right click on the test and choose Run. This will open the Test Run screen. Notice, now this test is automated it no longer starts the test runner by default. If you want to run the test manually, choose Run with options to choose to run it manually.
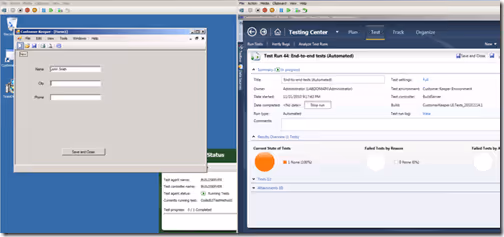
Here you can see the test is running on the Test machine while the test run shows that it is in progress. The test run does not refresh very well. Be sure to manually click on the refresh or it may appear to jump to finished.
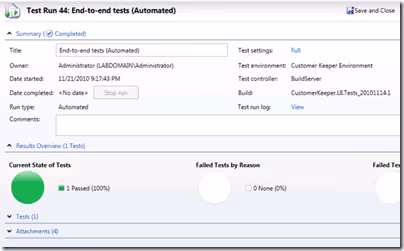
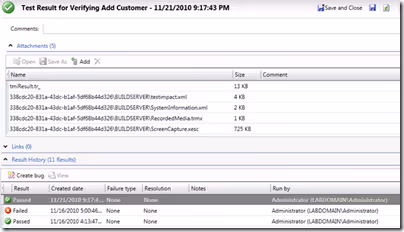
Here the test shows that has completed and the status is passed.
Lastly, you can look at the test results to view the status and see any of the diagnostic data. The ScreenCapture.xesc is video recording of the test. This is usual because normally you wouldn’t be logged into the machine running the test. Be sure that the machine that is viewing the screen capture also has the Microsoft Encoder installed.
I know this ended up being a long post. I hope you found it useful.

We're here to help you tackle what's next in your digital journey.


