May 19, 2023
Are you wanting to use Azure and not sure where to start when it comes how to deploy and host your application? New to a platform like Azure Kubernetes Service (AKS) and not sure what you have to do to go from repo to deployed application? An Azure DevOps project is the perfect tool to get started with any Azure application. With a few clicks, an Azure DevOps project will create a repo with a sample app, create a Visual Studio Team Services (VSTS) build and release pipeline, provision the environment, and provide an application dashboard site in Azure.
My two top reasons for using Azure DevOps projects
I think the tool does a great job with #1 and truly provides an easy and quick way to get any type of application started in Azure.
As for #2, I know there are improvements coming but there are quite a few manual steps for adding additional environments. This article will discuss all of the steps to go from everything automatically created in one environment to being able to deploy to an additional environment.
Azure DevOps projects are a resource in Azure that you configure to provision the resources in Azure and VSTS that you need for source control, CI builds, and CD pipeline with everything configured to deploy to the Azure resources. I will highlight a couple aspects about Azure DevOps projects but refer to the Overview of Azure DevOps Projects for more information.
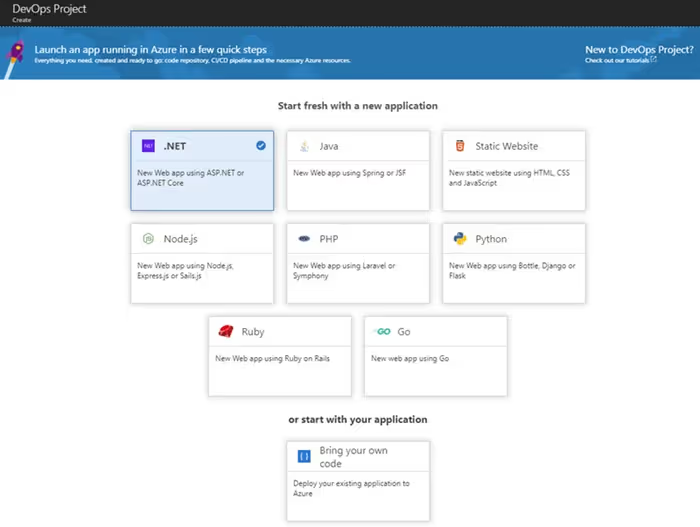
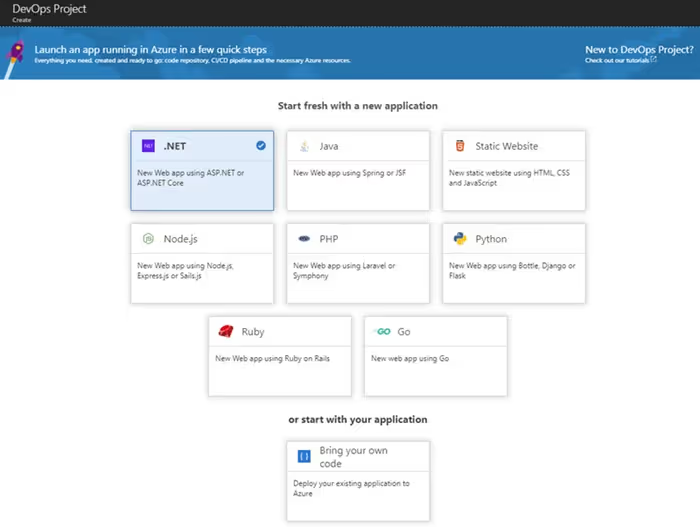
In the Azure Portal, when you choose to create a new DevOps Project, you will get the following dialog. Here you can choose from a number of sample projects or even use your own code base. If you are new to Azure or building CI/CD pipelines in VSTS, I recommend starting with their sample and then swapping you code in after the repo has been created. In this case I'm creating a .NET web application using ASP.NET hosted in a Web App and choosing those options in the next couple of screens.
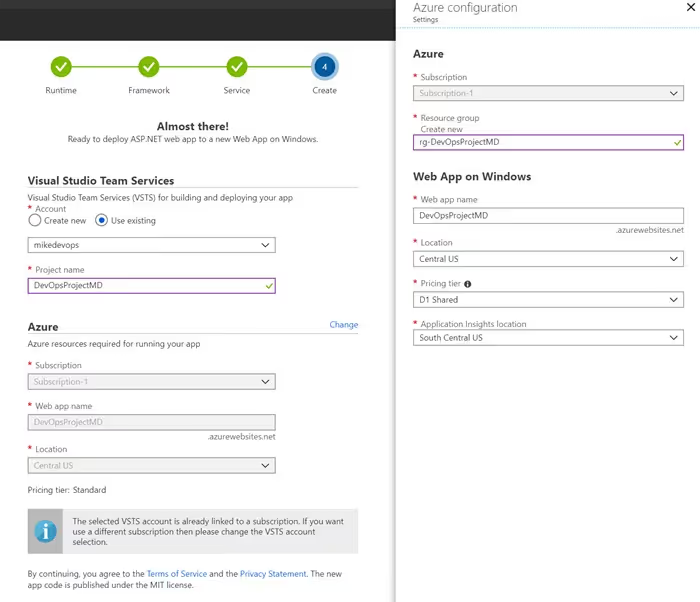
Once you have chosen the type of application to use, you then select the VSTS account and Azure configuration. TIP - Use the "Change" link to display additional Azure configurations including changing the pricing tier from Standard to D1 Shared.
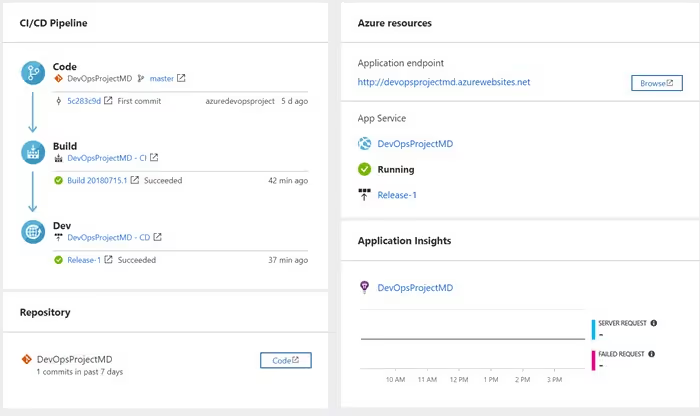
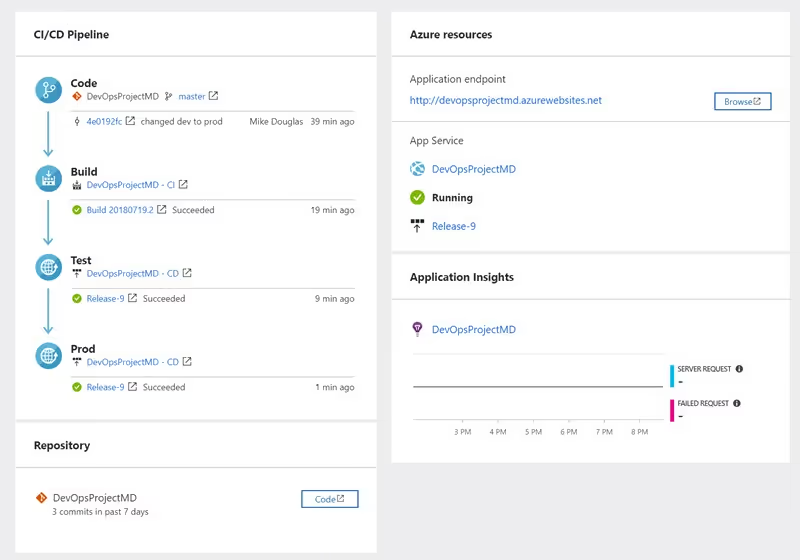
After you confirm these settings, the provisioning process will begin. This takes longer than other resources because it isn't just provisioning the Azure infrastructure, this is also creating the VSTS resources including the Git Repo, CI Build, and Release pipeline. Once the pipeline succeeds everything will be provisioned and the application will be deployed. The Azure DevOps project provides a nice dashboard of the major aspects of your application including the CI/CD Pipeline, Azure resources, and Application Insights.
My favorite feature of Azure DevOps project is that all of the artifacts it creates are standard items in Azure and VSTS. This means that none of this is magic and isn't a black box that can't be customized. This allows the you to use Azure DevOps projects to achieve the goals I outlined at the beginning. At the very least, you can use it to learn how all the pieces work together and how to deploy a particular application type.
More importantly, I want to use this as the foundation for the rest of my CI/CD Pipeline. So I will walk through what is needed to add an additional environment for an ASP.NET web app.
The end result of the Azure DevOps project deployment is deployment to the Dev environment. However, we are going to rename this in the CI/CD pipeline to production, so name the resources when creating the Azure DevOps project like it is production. This allows the application focused resources to be production scoped instead of dev only.
The CI/CD pipeline currently deploys the app but doesn't provision the infrastructure. This is the first thing to add. Each environment deployment should be responsible provisioning the infrastructure and deploying the application. The ARM template is included in the repo for web app, however it doesn't include the environment parameters.
Clone the repo that was created for you during the Azure DevOps project creation. This will allow us to add the files we need and commit them to the remote repo. To add the environment parameter files, we need to identify what they are currently set to. The template will have a list of parameters but to see the values, we can find the actual values in the portal under deployments.
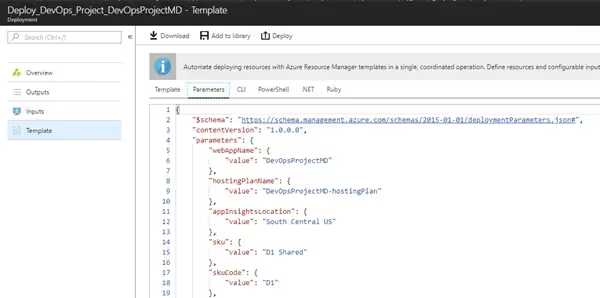
Create prod and test environment parameter files. Using the values (minus the skuCode setting) from template settings in the portal above. Properties should match.
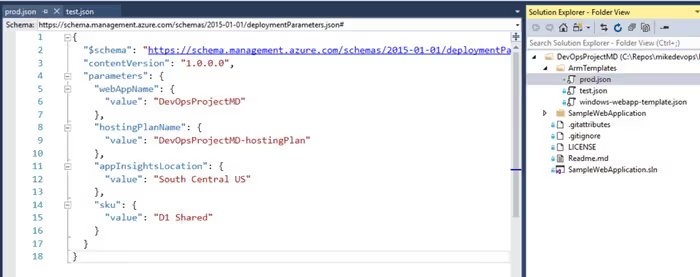
Commit the changes and push these files to the Git remote repo. This will kick off the CI/CD process but because we haven't updated that yet, nothing will be updated.
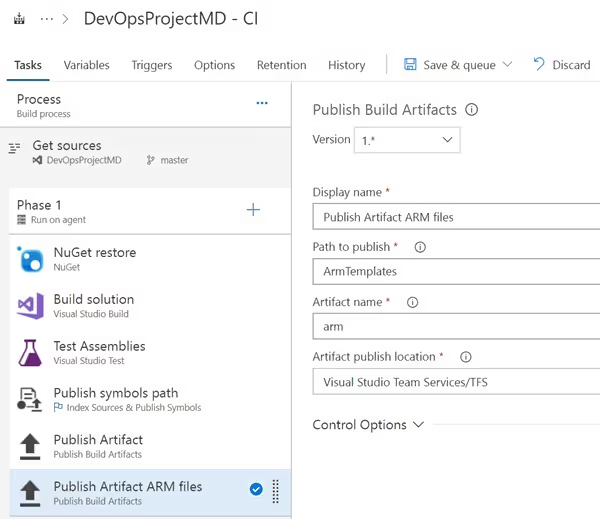
The build publishes the application but doesn't include the ARM template and config. Add an additional publish task and upload the ARM artifacts. Save and queue a new build to add the files to the artifacts.
First rename the Dev environment in the release to production. Now that the environment config files are part of the build artifacts, add an Azure Resource Manager task to the Prod environment to publish the infrastructure. Since Prod is already deployed, technically this should do nothing but will be required for deploying to the test environment. Unfortunately the service endpoint created by the Azure DevOps project was scoped to the website. Typically these are created at the resource group level or for a group of resource groups. In this case let's create a new one scoped to our resource group. One the Azure Subscription item, click Manage. Choose New Service Endpoint > Azure Resource Manager. Call it it something like "Your Project - Prod", and select your subscription and the resource group for this project.
Use this new connection for the Azure subscription setting. The resource group should show up in the Resource group list. Location should be the same as what you originally selected when creating the DevOps project.
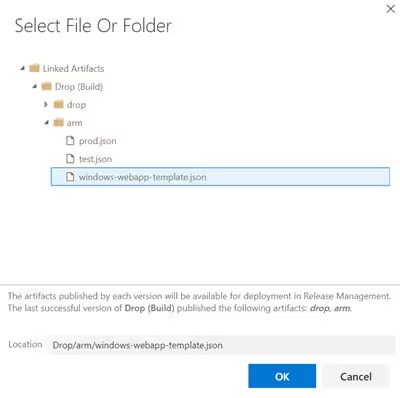
For the Template setting, use the ellipsis to open the Linked Artifacts dialog and choose the newly added ARM template files. Choose the template JSON file. Repeat the project for the Template parameters to add the prod JSON parameters.
Now that the template and parameters have been selected, here is what the task should look like.
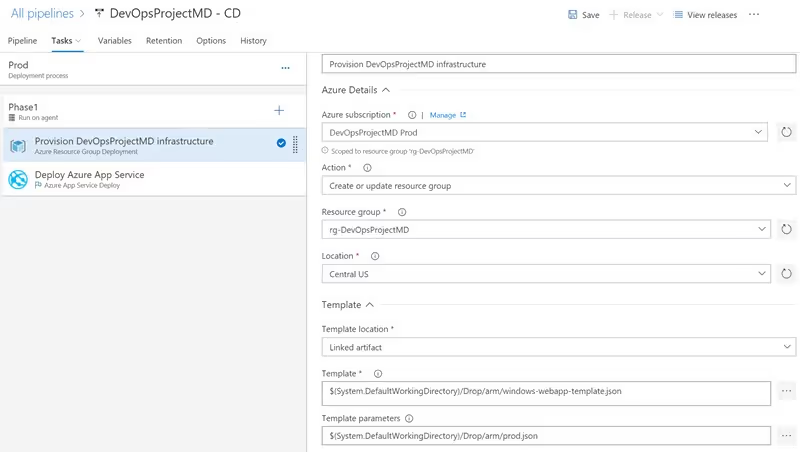
Save the release definition and queue a new release to verify the infrastructure deploys correctly. Again for Prod, the deployment should detect that the infrastructure is already deployed and do nothing.
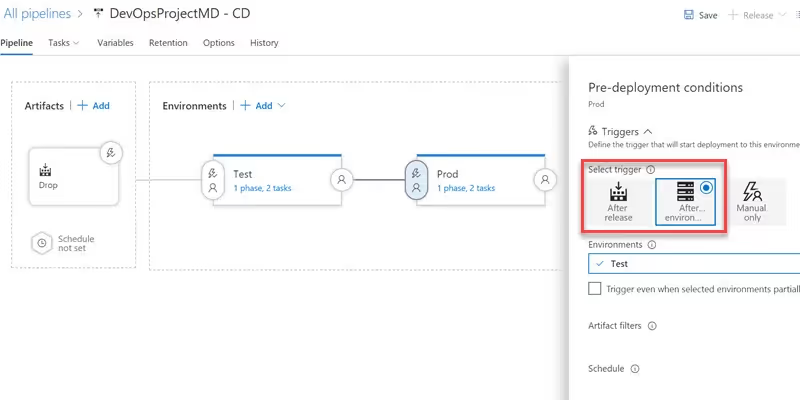
Now that the Prod environment is deploying both the infrastructure and the application, we want to repeat this process for test. Release management provides a clone environment option to quickly repeat the all of the steps from the previous environment. This is exactly what we want to do. In the pipeline view, choose the clone option and rename the environment to Test. Next switch the environments so Test comes before Prod. To do this, click on the Pre-deployment conditions for Prod and select After Release. Then change Prod to After environment and select Test. It should look like the image below.
Update the following to point to the test environment
The Azure DevOps portal is updated to reflect the new environments. However it doesn't update any of the application resources that is why I wanted to treat the original resources created by the tool as production. This is still an area I want to investigate to see if updating the ARM settings will show the application resources for all environments.
There were are a few limitations that I noticed when using Azure DevOps projects
Here are some possible next steps to add to fully create your CI/CD Pipeline.
That's it! As you can see, by getting the items set up correctly, make adding additional environments quick and straight forward. I hope you use the Azure DevOps projects to quickly get started. As always feel free to discuss any questions or comments on Twitter at @mikedouglasdev
