
March 1, 2023
Welcome back to my 3 part series on using VSTS to tokenize Angular application builds and deployments. In Part I, I walk through the scenario and provide an overview of the solution. I walked through what needs to be configured in the Angular application to support local development. Configuring the build and package is explained in this part and the deployment in a release pipeline is covered in Part III.

In Part II, I will go through configuring VSTS to create a build definition to create the deployment artifacts that can be used to deploy all environments. Remember my goal is to build once and deploy the same code all of the other environments. Therefore this build will need to package everything required to be deployed to all environments.
The following image shows the build definition for packaging the application. Each of the numbered steps are key tasks for building the packages. I will explain each of these steps.

1. npm install - this task is used restore all of the node packages that are used in build process in Visual Studio, Gulp, and Webpack. See your package.json to see a list of the files it will download.
2. Visual Studio Build - this task will build your Web Api project. Add the following to the MSBUILD arguments to have the build process also create the Web Deploy package to use /p:OutDir=$(build.stagingDirectory) /p:DeployOnBuild=true /p:WebPublishMethod=Package /p:PackageAsSingleFile=true /p:SkipInvalidConfigurations=true
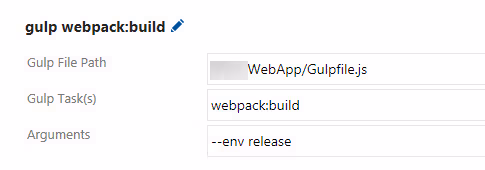
3. Gulp - The gulp build task will call the webpack:build gulp task passing in the release environment specifying webpack to use the release configuration. This configuration skips replacing the configuration token as it did locally when using the dev configuration. We want the release process to replace the token with the specific environmentvalue.
4. Our solution contains an ASP.NET Web Api application. I'm using SetParameters files to achieve build once and deploy to many environments. The Copy files task copies the SetParameters files into the webAPI_Package folder so it will be included in the artifact contentsin step 6.
5. This step packages the Angular 2 application by publishing everything in the dist folder that was outputted by the webpack build task.
6. The final step is publishing the Web API project's WebAPI_Package folder.
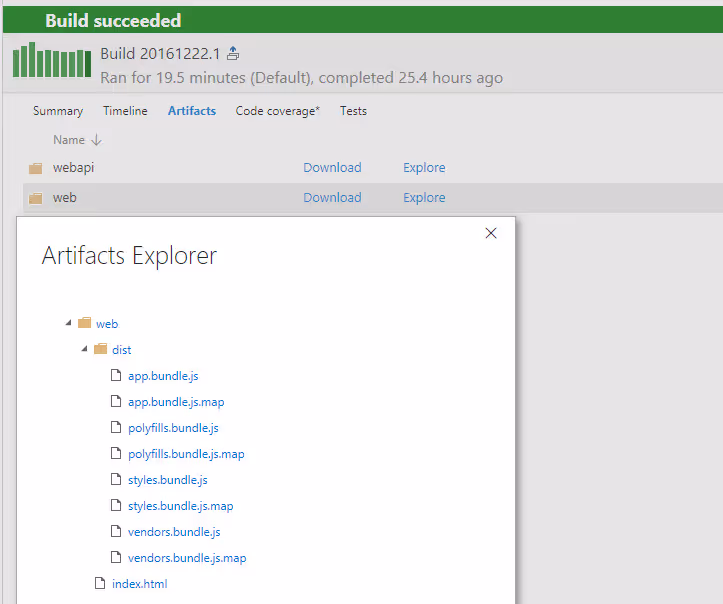
The results of the build are these artifact packages. By creating two separate packages, it makes the usage in the release more readable. Within the web package, you can see the minified and bundled js files were created as part of the webpack build process.

We're here to help you tackle what's next in your digital journey.


